(508) 492-8975

The Importance of Threads
Threads, those spiral grooves we find on screws, bolts, and nuts, are omnipresent in our modern world. They play a fundamental role in holding structures together, ensuring fluid and gas flow in plumbing systems, and allowing machinery to function smoothly. Threads are the unsung heroes of mechanical engineering, silently performing their duties in countless applications.
The Role of Drill Taps, Taps, and Dies
Drill taps, taps, and dies are indispensable tools when it comes to creating threads. Whether you're a DIY enthusiast, a mechanic, a machinist, or a metalworker, understanding these tools and how to use them is essential. In this comprehensive guide, we'll delve deep into the world of threads, exploring the nuances of drill taps, taps, and dies. We'll cover everything from the basics of threads to advanced techniques, safety considerations, applications, and even the latest innovations in thread cutting. By the end of this journey, you'll be equipped with the knowledge and skills to master the art of thread cutting.
Basics of Threads
Threads are essentially helical ridges or grooves that wrap around a cylindrical or conical object. They can be internal (on the inside of a hole or nut) or external (on the outside of a bolt or screw). Threads serve two primary functions:
-
Fastening: Threads allow components to be securely joined together. When a threaded bolt is turned into a threaded nut, the helical shape of the threads draws the components together, creating a strong connection.
-
Mechanical Advantage: Threads can also be used to create a mechanical advantage. For example, a screw jack uses threads to lift heavy loads with minimal effort.
Thread Types
Threads come in various types, and each type serves a specific purpose. The choice of thread type depends on factors like the application, load-bearing capacity, and ease of assembly. Some common thread types include:
-
Unified Thread Standard (UTS): This is the most widely used thread standard in the United States. It includes Unified National Thread (UN) and Unified National Fine (UNF) threads.
-
Metric Thread: Metric threads are widely used outside of the United States. They are defined by pitch (the distance between thread crests) and are measured in millimeters.
-
NPT (National Pipe Thread): NPT threads are used for plumbing and pipe fittings. They have a tapered design to create a watertight seal.
-
Acme Thread: Acme threads are trapezoidal in shape and are commonly used in machinery for power transmission and positioning.
-
Buttress Thread: Buttress threads have one side with a 45-degree angle and another side with a 90-degree angle. They are used for applications where high axial thrust is required, such as in vices and presses.
Thread Measurement
Accurate measurement of threads is crucial for selecting the right taps and dies. Threads are typically measured by their major diameter (the outermost diameter of the thread) and their pitch (the distance between threads). Thread measurement may also include parameters like thread depth and angle.
Drill Taps: The Essentials
What is a Drill Tap?
A drill tap, often called a tap drill, is a specialized cutting tool used to create threads inside a hole or a drilled opening. It combines the functions of a drill bit and a tap, allowing you to both create a hole and thread it in a single operation. Drill taps are particularly useful when you need to tap holes in materials like metal or plastic.
Types of Drill Taps
There are different types of drill taps designed for specific applications and materials. The main types of drill taps include:
-
Spiral Point Tap: This type of tap has a spiral flute that pushes chips ahead of the tap. It is designed for through-hole applications, where the tap goes all the way through the material.
-
Spiral Flute Tap: Spiral flute taps are suitable for blind-hole applications, where the hole does not go completely through the material. The flutes allow chips to escape upward.
-
Forming Tap: Forming taps work by displacing material rather than cutting it. They are often used in materials that are prone to chipping or breaking, like brass or aluminum.
-
Pipe Tap: Pipe taps are designed specifically for creating threads in pipe fittings. They have a tapered shape to create a tight seal.
How to Use Drill Taps
Using a drill tap effectively requires precision and care. Here's a step-by-step guide on how to use a drill tap:
-
Select the Correct Drill Bit: To begin, you'll need to choose a drill bit that matches the size of the tap you intend to use. Refer to a drill and tap chart or use a tap and drill bit set that provides the correct pairing.
-
Secure Your Material: Ensure that the material you're working with is securely clamped or held in place. This prevents movement during drilling and tapping.
-
Drill a Hole: Use the selected drill bit to create a hole in your material. The hole should be slightly smaller in diameter than the tap you plan to use.
-
Insert the Drill Tap: Insert the drill tap into the drilled hole, ensuring it's aligned correctly and perpendicular to the surface.
-
Apply Lubricant: To reduce friction and heat buildup, apply a suitable cutting fluid or lubricant to the tap and the material.
-
Turn the Tap: Begin turning the tap clockwise (righty-tighty) while applying gentle downward pressure. The tap will start cutting threads into the material.
-
Back Off Periodically: While tapping, periodically reverse the tap (counter-clockwise or lefty-loosey) slightly to break and clear any chips that may have accumulated.
-
Continue Tapping: Continue tapping until you've reached the desired depth or until you've completed the thread. Use a thread gauge or the fastener you plan to use to check the fit.
-
Clean and Inspect: Remove the tap, clean the threads, and inspect for any imperfections or debris.
Common Drill Tap Problems and Solutions
Using drill taps can sometimes lead to issues that affect the quality of the threads or the longevity of the tap. Here are some common problems and their solutions:
-
Tap Breakage: If the tap breaks inside the hole, it can be challenging to remove. To avoid this, ensure the material is properly lubricated, and don't apply excessive force while tapping.
-
Chips Clogging the Flutes: Chips can accumulate in the flutes of the tap, causing it to jam. Use a chip brush or compressed air to clear the chips during the tapping process.
-
Misalignment: Misalignment of the tap can result in crooked or damaged threads. Use a tap guide or tap wrench to keep the tap aligned correctly.
-
Over-Tapping or Under-Tapping: It's important to tap to the correct depth to ensure the threads match the fastener you intend to use. Use depth stops or depth control on your tap wrench to avoid over-tapping or under-tapping.
Taps: Unraveling the Mystery
Types of Taps
While drill taps combine drilling and tapping functions, taps are dedicated tools designed solely for creating threads. There are various types of taps, each suited to specific applications and materials. The main types of taps include:
-
Hand Taps: Hand taps are general-purpose taps suitable for manual use. They have tapered ends to assist with alignment and starting threads.
-
Machine Taps: Machine taps are designed for use in power tools or machines. They have a longer shank and are often used in production settings.
-
Pipe Taps: Pipe taps are specialized taps for creating threads in pipe fittings. They have a tapered shape to create a tight seal.
-
Forming Taps: Similar to drill taps, forming taps work by displacing material rather than cutting it. They are often used in materials that are prone to chipping or breaking.
-
Spiral Point Taps: These taps have a spiral flute that pushes chips ahead of the tap. They are designed for through-hole applications.
-
Spiral Flute Taps: Spiral flute taps are suitable for blind-hole applications. The flutes allow chips to escape upward.
Anatomy of a Tap
Understanding the anatomy of a tap is crucial for using it effectively. Here are the key components of a tap:
-
Shank: The shank is the portion of the tap that you hold when turning it. It can be square or hexagonal to fit a tap wrench or a chuck.
-
Flutes: Flutes are the spiral grooves on the tap's body. They help in chip evacuation and cutting threads.
-
Threads: The threads on the tap are the cutting edges responsible for creating threads in the material.
-
Chamfer: The chamfer is the tapered portion at the front end of the tap. It helps guide the tap into the hole and start the thread.
How to Use Taps
Tapping with a tap involves a series of steps, similar to using a drill tap. Here's a guide on how to use taps effectively:
-
Select the Right Tap: Choose the appropriate tap type and size for your application. Ensure it matches the hole size and thread pitch requirements.
-
Secure Your Material: Clamp or secure the material in a vise or workbench to prevent movement while tapping.
-
Create a Starting Hole: Use a center punch to create a small indentation at the center of the area where you want to create threads. This helps the tap start straight.
-
Apply Lubricant: Apply a cutting fluid or tapping lubricant to both the tap and the material to reduce friction and heat.
-
Insert the Tap: Align the tap with the starting hole and begin turning it clockwise (righty-tighty) by hand. Make sure it's perpendicular to the surface.
-
Tapping Process: As you turn the tap, it will begin cutting threads into the material. Apply consistent, gentle pressure and avoid excessive force.
-
Backing Off: Periodically, reverse the tap slightly (counter-clockwise or lefty-loosey) to break and clear any chips. Continue tapping until you've reached the desired depth.
-
Clean and Inspect: Remove the tap, clean the threads, and inspect for any imperfections, debris, or burrs.
Tips for Successful Tapping
-
Always ensure that the tap is properly aligned with the hole to avoid misaligned or damaged threads.
-
Use a tap guide or a tapping fixture to maintain perpendicularity while tapping.
-
Lubricate the tap and the material generously to reduce friction and heat. This also helps prolong the life of the tap.
-
For blind-hole tapping, periodically withdraw the tap to clear chips and prevent binding.
-
Use a thread gauge or a fastener to check the quality and fit of the threads.
Restoring Damaged Threads
Sometimes, threads can become damaged or stripped due to wear, corrosion, or other factors. In such cases, you can use a thread restorer or thread chaser to repair the threads without the need for a complete re-tap. These tools are designed to clean and reshape damaged threads, saving time and resources.
Dies: Cutting Threads on External Surfaces
Introduction to Dies
While taps are used to create threads on the inside of holes or nuts, dies are used to cut threads on the external surfaces of rods, bolts, or pipes. Dies come in various types and sizes to accommodate different materials and thread specifications.
Types of Dies
There are two primary types of dies: round dies and hexagonal dies. Round dies are typically used for threading rods and bolts, while hexagonal dies are used for threading pipes. The choice of die type depends on the material and the application.
How to Use Dies
Using a die to cut threads on an external surface is a straightforward process, but it requires careful alignment and patience. Here's a step-by-step guide on how to use dies:
-
Select the Correct Die: Choose the appropriate die size and type for your material and thread requirements. Ensure it matches the diameter and thread pitch.
-
Secure the Workpiece: Clamp the rod or bolt securely in a vise or workbench, leaving the portion where you want to cut threads exposed.
-
Prepare the Workpiece: Use a file or emery cloth to clean and smooth the portion of the workpiece where you intend to cut threads. This removes any burrs or imperfections that could hinder the threading process.
-
Apply Lubricant: Apply a suitable cutting fluid or tapping lubricant to the workpiece and the die to reduce friction and heat.
-
Align the Die: Hold the die perpendicular to the workpiece and align it with the starting point for the threads.
-
Begin Threading: Begin turning the die clockwise (righty-tighty) by hand. Make sure it starts straight and doesn't bind or wobble.
-
Maintain Pressure: Apply even and steady downward pressure as you continue turning the die. Avoid using excessive force, as it can damage the die or the workpiece.
-
Backing Off: Periodically, reverse the die slightly (counter-clockwise or lefty-loosey) to break and clear any chips. Continue threading until you've reached the desired length.
-
Inspect and Clean: Remove the die and inspect the threads for quality and accuracy. Clean the threads and remove any burrs or debris.
Tips for Using Dies Successfully
-
Maintain a perpendicular angle while threading to ensure straight and uniform threads.
-
Lubricate the workpiece and die to reduce friction and heat, which can lead to better results and longer tool life.
-
Use a die holder or die stock to provide better control and leverage while threading.
-
Check the alignment and fit of the threads using a thread gauge or a matching nut or bolt.
Choosing the Right Tools
Choosing the right tap or die for a specific application is crucial for achieving the desired results. Here are some factors to consider when selecting the appropriate tools:
Selecting the Right Tap or Die
-
Thread Specification: Start by determining the thread size, pitch, and type required for your application. Refer to thread charts or specifications to find the exact measurements.
-
Material Compatibility: Different materials require different taps and dies. Consider the material you're working with, whether it's metal, plastic, wood, or another substance.
-
Tool Type: Decide whether you need a hand tap, machine tap, pipe tap, round die, or hexagonal die based on your application and whether you're using manual tools or machines.
-
Thread Depth: Depending on your project, you may need a tap or die with a specific thread depth or length. Ensure the tool you select matches your requirements.
-
Quality and Brand: Invest in high-quality taps and dies from reputable manufacturers. Quality tools not only perform better but also last longer.
Materials and Coatings
Taps and dies are available in various materials and coatings to enhance their durability and performance. Some common materials and coatings include:
-
High-Speed Steel (HSS): HSS taps and dies are suitable for a wide range of materials and applications. They are known for their durability and resistance to wear.
-
Carbon Steel: Carbon steel taps and dies are cost-effective options for general-purpose threading. However, they may not be as durable as HSS tools.
-
Cobalt Steel: Cobalt steel taps and dies offer enhanced heat resistance and cutting performance, making them ideal for high-temperature applications.
-
Titanium Nitride (TiN) Coating: TiN-coated tools have improved hardness and wear resistance. They are excellent for threading abrasive materials.
-
TiCN and TiAIN Coatings: These coatings provide further improvements in tool life and performance in demanding applications.
Tapping and Threading Accessories
In addition to taps and dies, several accessories can aid in the threading process and improve results:
-
Die Holders and Die Stocks: These tools hold round and hexagonal dies securely in place while threading external surfaces.
-
Tap Wrenches and Tap Handles: Tap wrenches and handles provide a grip for turning taps manually. Choose the appropriate size and style for your tap.
-
Thread Gauges: Thread gauges are essential for checking the accuracy and fit of threads created by taps and dies.
-
Tapping Lubricants: Cutting fluids and lubricants reduce friction and heat during the threading process, prolonging tool life and enhancing results.
-
Thread Repair Kits: These kits contain tools and inserts for repairing damaged threads in various materials.
Safety Considerations
Protective Gear
Safety should always be a top priority when working with taps, dies, and other threading tools. Ensure you wear appropriate personal protective equipment (PPE) to minimize the risk of injury. Recommended PPE includes:
-
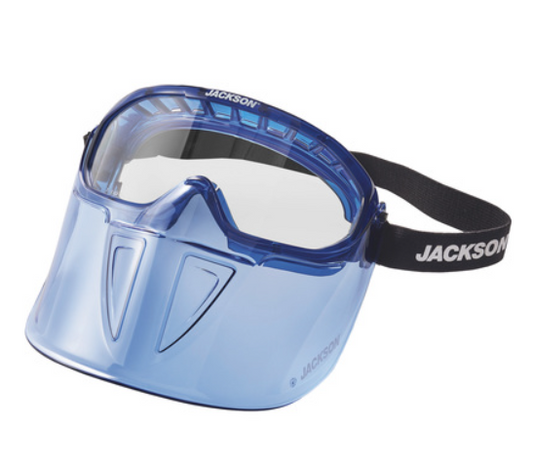
Safety Glasses or Goggles: Protect your eyes from flying chips, debris, or splashes of cutting fluid.
-
Hearing Protection: If you're working with power tools or in a noisy environment, wear hearing protection to prevent hearing damage.
-
Gloves: Wear gloves to protect your hands from sharp edges, burrs, and heat generated during the threading process.
-
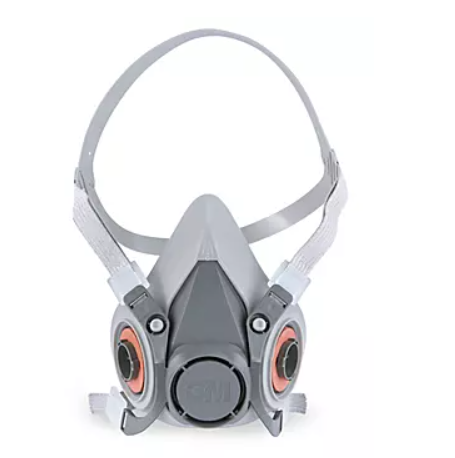
Respirator: If you're using cutting fluids or working in a confined space with poor ventilation, wear a respirator to avoid inhaling fumes.
-
Appropriate Clothing: Avoid loose-fitting clothing that can get caught in machinery. Opt for long sleeves and pants to protect your arms and legs.
Proper Setup
Setting up your work area correctly is essential for safety. Follow these guidelines:
-
Stable Work Surface: Ensure your workbench, vise, or clamps are stable and securely hold the material you're working on.
-
Good Lighting: Adequate lighting helps you see what you're doing and reduces the risk of accidents.
-
Clear Work Area: Keep your work area free from clutter and distractions that could lead to accidents.
-
Secure Workpiece: Always clamp or secure the workpiece to prevent movement during threading.
Safe Operation
When operating taps and dies, follow these safety rules:
-
Avoid Excessive Force: Don't force the tool; let it cut at its own pace. Excessive force can lead to tool breakage or accidents.
-
Maintain Control: Keep a firm grip on the tool, and ensure it doesn't slip or get away from you.
-
Stay Focused: Pay close attention to what you're doing. Avoid distractions and interruptions while threading.
-
Use the Right Tool: Don't use a tool for a purpose it wasn't designed for. Using the correct tap or die for the job is crucial for safety and performance.
-
Monitor Cutting Fluids: Be cautious when using cutting fluids. Some fluids can be flammable or produce fumes. Follow the manufacturer's recommendations for safe use.
By following these safety considerations, you can minimize the risk of accidents and ensure a safer threading experience.
Applications of Drill Taps, Taps, and Dies
Drill taps, taps, and dies find applications in various industries and tasks. Let's explore some common uses across different fields:
Automotive Repairs
-
Threaded Fasteners: Taps and dies are used extensively in automotive repairs for threading bolts, screws, and other fasteners. They play a critical role in engine repairs, suspension work, and bodywork.
-
Exhaust Systems: Creating threads in exhaust system components ensures secure connections and prevents leaks.
-
Spark Plug Installation: Taps are used to clean and repair spark plug threads in cylinder heads.
Plumbing
-
Pipe Fittings: Pipe taps are essential for creating threads on pipe fittings to ensure tight seals and prevent leaks in plumbing systems.
-
Water Line Connections: Taps and dies are used to create threads on water line connectors and valves.
Woodworking
-
Furniture Construction: Taps and dies are used in woodworking to create threads for fastening wooden parts together. They are common in furniture making.
-
Woodturning: Woodturners use taps and dies to create custom threaded knobs, handles, and other decorative elements.
Metalworking
-
Machining: Taps and dies are indispensable tools in metalworking for creating threaded holes in machine parts and components.
-
Tool and Die Making: Precision threads are crucial in tool and die making, and taps and dies are used extensively in this field.
-
Aerospace: In the aerospace industry, high-quality threads are essential for ensuring the integrity of critical components.
Construction
-
Structural Steel: Taps and dies are used in construction for threading bolts, anchors, and connectors in structural steel applications.
-
Concrete Formwork: Threaded connections are used in concrete formwork systems to secure and align form panels.
These are just a few examples of the many applications of drill taps, taps, and dies across various industries. Their versatility and importance in creating strong and reliable connections make them essential tools in manufacturing, repair, and construction.
Advanced Techniques
In addition to the basics of thread cutting, there are advanced threading techniques and specialized threads used in specific applications. Let's explore some of these advanced topics:
Acme Threads
Acme threads are trapezoidal threads known for their efficiency in translating rotational motion into linear motion. They are commonly used in power transmission and positioning applications. Acme threads have a trapezoidal shape with a 29-degree angle on the flanks, which provides smoother engagement and higher load-carrying capacity compared to standard threads.
Buttress Threads
Buttress threads have a unique shape with one side featuring a 45-degree angle and the other side a 90-degree angle. This asymmetrical design is ideal for applications requiring high axial thrust in one direction, such as vices, presses, and jacks. Buttress threads offer excellent resistance to axial forces and are often found in heavy-duty machinery.
Taper Threads
Taper threads, as the name suggests, have a tapered shape. They are commonly used in pipe fittings to create a tight and leak-proof seal. National Pipe Thread (NPT) and British Standard Pipe (BSP) threads are examples of tapered threads. Taper threads require careful alignment during tapping or threading to ensure a proper seal.
Left-Handed Threads
Most threads are right-handed, meaning they tighten when turned clockwise (righty-tighty). Left-handed threads, however, tighten when turned counterclockwise (lefty-loosey). These threads are used in specific applications where it's important to prevent unintentional loosening due to rotation, such as on bicycle pedals or some fasteners in machinery.
Multi-Start Threads
Multi-start threads have multiple thread grooves that wrap around the screw or bolt. They allow for faster engagement and disengagement with correspondingly fewer turns. This can be advantageous in applications where quick assembly or disassembly is required, such as in some industrial equipment.
Each of these advanced threading techniques has its own specific use cases and considerations. Understanding them can be valuable in situations where standard threads may not provide the required performance.
Maintenance and Care
Proper maintenance and care of your taps, dies, and threading tools are essential to ensure their longevity and performance. Here are some tips for maintaining your threading tools:
Cleaning and Lubricating Tools
-
After each use, clean the taps, dies, and other threading tools thoroughly to remove debris, chips, and cutting fluids. Use a wire brush, compressed air, or a specialized cleaning tool for this purpose.
-
Apply a light coating of anti-corrosion oil or rust inhibitor to protect the tools from moisture and oxidation when they are not in use.
-
Keep taps and dies organized and stored in a dry, cool place to prevent rust and damage.
Storing Drill Taps, Taps, and Dies
-
Use protective caps or sleeves to cover the cutting edges of taps and dies when they are not in use. This helps prevent accidental damage and keeps the edges sharp.
-
Store your threading tools in a designated toolbox or storage case to protect them from dust and contaminants.
-
Keep taps and dies organized and labeled by size and type for easy access.
Sharpening and Reconditioning
-
Taps and dies can become dull or damaged over time. Consider investing in a tap and die sharpening kit or using a professional sharpening service to maintain the sharpness of your tools.
-
When reconditioning threading tools, follow manufacturer recommendations for regrinding angles and clearances to ensure proper cutting performance.
By following these maintenance and care practices, you can extend the life of your taps, dies, and threading tools, ensuring that they remain reliable and effective for years to come.
Troubleshooting Common Issues
Despite taking precautions and following best practices, issues may arise during the threading process. Let's explore some common problems and their solutions:
Tap Breakage
-
Cause: Excessive force or improper alignment can lead to tap breakage.
-
Solution: Ensure the tap is aligned correctly, perpendicular to the workpiece. Use lubrication and apply gentle, consistent pressure while tapping.
Chip Evacuation Problems
-
Cause: Chips can accumulate in the flutes of taps and dies, leading to threading difficulties.
-
Solution: Periodically reverse the tap or die to break and clear chips. Use cutting fluid or lubricant to aid chip evacuation.
Misalignment
-
Cause: Misalignment of the tap or die can result in crooked or damaged threads.
-
Solution: Use a tap guide, tap wrench, or die holder to maintain proper alignment during threading.
Oversized or Undersized Threads
-
Cause: Using the wrong tap or die size or pitch can result in oversized or undersized threads.
-
Solution: Verify the correct tap or die size and pitch for your application. Use thread gauges to ensure accuracy.
Remember that patience and attention to detail are key to troubleshooting and resolving threading issues. If problems persist, seek advice from experienced professionals or consult the manufacturer's guidelines for specific troubleshooting tips.
Innovations in Thread Cutting
The world of thread cutting is not immune to technological advancements. Innovations in materials, tool coatings, and manufacturing processes continue to improve the efficiency and effectiveness of taps, dies, and threading tools. Here are some notable innovations:
High-Speed Steel Taps and Dies
High-speed steel (HSS) taps and dies have been enhanced with improved heat resistance and wear properties. This allows for faster cutting speeds, extended tool life, and enhanced performance in a wider range of materials.
Carbide Taps and Dies
Carbide taps and dies are becoming more prevalent, especially in industries where high-precision threading is required. Carbide tools offer exceptional hardness and wear resistance, making them ideal for threading abrasive materials like hardened steel and titanium.
CNC Thread Cutting
Computer Numerical Control (CNC) machines have revolutionized thread cutting in manufacturing. CNC thread cutting offers precise control over thread dimensions, pitch, and depth, resulting in consistently high-quality threads. This technology is commonly used in aerospace, automotive, and medical device manufacturing.
These innovations have made thread cutting more efficient, precise, and adaptable to a broader range of materials and applications. Staying informed about the latest developments in threading tools can help you choose the best tools for your specific needs.
Resources and References
As you delve deeper into the world of drill taps, taps, and dies, you may find it valuable to explore additional resources and references:
Books
-
"Machinery's Handbook" by Erik Oberg and Franklin D. Jones: A comprehensive reference for all aspects of machine design and manufacturing, including threading.
-
"Thread Cutting" by Harold Hall: An accessible guide for beginners and DIY enthusiasts looking to learn more about thread cutting techniques.
Online Forums and Communities
- Websites like Practical Machinist (practicalmachinist.com) and Home Shop Machinist (homeshopmachinist.net) feature forums where enthusiasts and professionals discuss threading techniques and share experiences.
Tool Manufacturers
-
Consult the websites and resources provided by tool manufacturers like Greenfield Tap & Die, Irwin Tools, and OSG Corporation for product information, tutorials, and technical support.
-
Local tool supply stores and manufacturers' representatives can also provide valuable insights and recommendations for specific threading projects.
Mastering the art of thread cutting with drill taps, taps, and dies is a valuable skill for DIY enthusiasts, machinists, mechanics, and professionals across various industries. From understanding the basics of threads to choosing the right tools, employing advanced techniques, and ensuring safety, this comprehensive guide has equipped you with the knowledge and skills needed to tackle threading tasks with confidence.
Whether you're building, repairing, or manufacturing, the ability to create precise and reliable threads is essential. By maintaining your tools, staying informed about innovations, and troubleshooting effectively, you can ensure that your threading projects yield high-quality results and stand the test of time.
As you continue your journey in the world of thread cutting, remember that practice and experience are the keys to becoming a master of this essential craft. With each project, you'll refine your skills and discover the nuances of thread cutting that make it both an art and a science.
Happy threading, and may your projects be threaded with success!